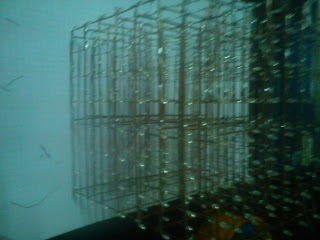
In my project I created my LED cube which is size of 8*8*8 (512 Leds). Here is the video
I used PIC16f877A microcontroller to control entire cube. It has 40 pins and about 30 -25 usable pins to our task. But thing we don't forget here is that cube has 512 LEDs and they should have separate 512 wires to work with. Here I used the theory of using layers. So each layer has 64 LEDs and there are 8 such layers. One layer is lighten up at a time. Using the sensitivity of our eyes we can pretend that all layers are lightening at once when we switch them in a very high frequency.
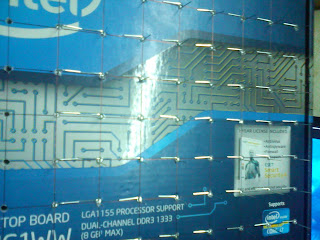
In a layer all cathodes of leds are connected to one and anodes are kept free. Creating a layer is a bit challenging task. We should guarantee that all leds in the layer are keeping 2.5 cm gap and lie on the same plane. So it is easy if we can make a model like this to create the layer.
Then we can put leds into these holes and solder as we wish
After all cathodes are soldered we can see a layer like this
After all layers are finished we can move to connect layers to each other. When we are connecting layers we should make sure that anodes of the leds of one layer should be connected to the same anodes of other layer. Finally we have 64 wires for layer anodes and 8 wires for layers (common cathodes of each layer).
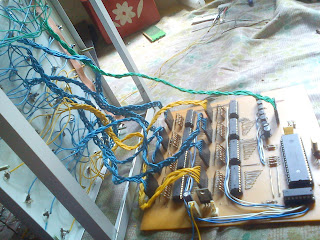
Next problem is how to connect all 64 wires of layers to microcntroller. Instead connecting them directly I used 8 74hc574 latch ics which have D flipflops. Using these ICs, you need only 20 pins from PIC. 8 pins to light up the layer leds, 8 pins to select the layer and 4 pins to select the latch ic.
Q0 - Q7 pins of 74hc574 (for more information refer to 74hc574 datasheet) ics are connected to rows of layer anodes. There are 8 rows the layer anodes so each row is represented by one latch ic. For putting data on a layer first select the latch ic and put data on PORTB of pic. Then move to next latch ic. When we move to next ic, values of previous ones are not changed because its D flipflops remind the previous states. Likewise we can light up a whole layer and then select the layer. Layer common cathodes are connected to J9. Using PORTD we can select a layer.
This is the brief description of the cube I have made. Those all are electronic stuffs and the most challenging task I have experienced is programming this cube. I used Timer0 clock interrupts of pic to switch between layers. Here is the code I have written. I used mikroc pro compiler
unsigned char layers[8][8]={0},i,j,k,l,m,n,q,x,y; //layers array has all values of the cube LEDs.
void loadRegister(int num){ //Here correct latch is selected
PORTA.B0 = num%2;
num=num>>1;
PORTA.B1 = num%2;
num=num>>1;
PORTA.B2 = num%2;
PORTA.B3=0;
PORTA.B3=1;
}
void loadLayer(int layerNum){ //lightening a layer is done
PORTD= 0b00000000;
for(i=0;i<8;i++){
PORTB=layers[layerNum][i];
loadRegister(i);
}
if(layerNum==0){
PORTD= 0b00000001; //selecting the layer
}else if(layerNum==1){
PORTD= 0b00000010;
}else if(layerNum==2){
PORTD= 0b00000100;
}else if(layerNum==3){
PORTD= 0b00001000;
}else if(layerNum==4){
PORTD= 0b00010000;
}else if(layerNum==5){
PORTD= 0b00100000;
}else if(layerNum==6){
PORTD= 0b01000000;
}else if(layerNum==7){
PORTD= 0b10000000;
}
}
int num=0,conter=0;
char doCount=0;
void interrupt(){ //Timer0 interrupts are handled at here. Here is the main driving section of the cube
if(INTCON.TMR0IF){
if(doCount){
conter++;
}
loadLayer(num);
num++;
if(num==8)num=0;
INTCON.TMR0IF = 0; // clear TMR1IF
}
}
void init_timer(){
OPTION_REG = 0b10000101; //Timer0 interrupts are configured
INTCON = 0b10100000; //Interrupts are enabled.
}
void delayms(int num){
doCount=1;
while(conter<num);
conter=0;
doCount=0;
}
int power(int p){
int val=1;
if(p==0)return 1;
for(k=0;k<p;k++){
val=val*2;
}
return val;
}
int clearAll(){
int i,j;
for(i=0;i<8;i++){
for(j=0;j<8;j++){
layers[i][j]=0;
}
}
}
void circle(int xcod,int ycod,int zcod,int rad){
int x,y,m;
for(x=0;x<8;x++){
for(y=0;y<8;y++){
for(m=0;m<8;m++){
if((x-xcod)*(x-xcod)+(y-ycod)*(y-ycod)+(m-zcod)*(m-zcod)-rad<=0){
layers[m][x]= layers[m][x]|power(y);
}
}
}
}
}
void parabola(int xcod,int ycod,int c){
int x,y,z;
//clearAll();
for(x=0;x<8;x++){
for(y=0;y<8;y++){
for(z=0;z<8;z++){
if(-(x-xcod)*(x-xcod)-(y-ycod)*(y-ycod)+c-z>=0)
layers[z][x] = layers[z][x]|power(y);
}
}
}
}
void plane(int a,int b,int c,int d){
int x,y,z;
//clearAll();
for(x=0;x<8;x++){
for(y=0;y<8;y++){
for(z=0;z<8;z++){
if((a*x+b*y-d)/c==z)
layers[z][x] = layers[z][x]|power(y);
}
}
}
}
int random,temp;
void main() {
TRISB =0;
TRISD=0;
TRISA=0;
ADCON1 = 0b00000111;
PORTA.B3=0; //en pin
init_timer();
while(1){
for(m=0;m<8;m++){
for(n=0;n<8;n++){
for(l=0;l<8;l++){
layers[l][m]=layers[l][m]+power(n);
delayms(10);
}
}
}
for(m=0;m<8;m++){
for(n=0;n<8;n++){
for(l=0;l<8;l++){
layers[l][m]=layers[l][m]-power(n);
delayms(10);
}
}
}
clearAll();
for(m=0;m<8;m++){
for(n=0;n<8;n++){
for(l=0;l<8;l++){
layers[l][m]=power(n);
delayms(10);
clearAll();
}
}
}
clearAll();
for(q=0;q<100;q++){
for(x=0;x<5;x++){
for(l=1;l<8;l++){
for(m=0;m<8;m++){
temp=layers[7-l][m];
layers[8-l][m]=temp;
}
}
random= rand()%64;
layers[0][random/8]=power(random%8);
delayms(15);
}
}
clearAll();
for(y=0;y<8;y++){
for(m=0;m<8;m++){
circle(m,m,m,4);
delayms(20);
clearAll();
}
}
for(y=0;y<8;y++){
for(m=0;m<8;m++){
circle(m,7-m,m,4);
delayms(20);
clearAll();
}
}
for(y=0;y<8;y++){
for(m=0;m<8;m++){
circle(7-m,7-m,m,4);
delayms(20);
clearAll();
}
}
for(y=0;y<8;y++){
for(m=0;m<8;m++){
circle(7-m,m,m,4);
delayms(20);
clearAll();
}
}
for(y=0;y<8;y++){
for(m=0;m<8;m++){
parabola(3,3,m);
delayms(50);
clearAll();
}
}
for(y=0;y<10;y++){
for(m=0;m<8;m++){
plane(rand()%5,rand()%5,rand()%5,rand()%5);
delayms(50);
clearAll();
}
}
}
}
I should say that this is a very very brief description and sometime you may find difficult to understand some concepts of this article. If so please don't hesitate to ask questions and I'm very happy to help you :)
Thank you


